Tags and Releases
What are tags?
Tags are a feature in Git that can be used to make a snapshot of a repository from a point in time. It is generally used to mark releases (e.g., v1.2.4), and it functions as a shortcut to see what the repo looked like at that time.
What are releases?
Releases are a feature in Forgejo, independent of Git, that allows you to attach files and release notes along with the source code at the time, and share it in Forgejo, linking to a Git tag.
Wait, what is the difference between tags and releases?
They are very similar. The difference is that tags are just the repository frozen in time and are part of Git (you can make a tag inside of Git), but releases are tags accompanied by a binary file and are not part of Git (you need to go to your repository page in the web interface to create a release).
Creating tags and releases
If you only want to create tags, using Git is recommended. If you want to create a full release, this is only possible through Forgejo’s web interface, or through its API.
Creating a Tag with Git
To create a tag using Git, use the following command in your local repository:
git tag -a <tag name> -m "<my tag message>"You can omit "<my tag message>" to write a longer tag message in an editor
window.
Tip: Tags are generally labeled by version numbers. It is good practice to
prefix a version number with a v (e.g., v1.2.3) and to use the Semantic
Versioning specification for assigning and incrementing
version numbers.
Tags are not automatically pushed when you run git push (compared to commits
or branches). They have to be pushed manually to the remote target, like so:
git push --tags <remote target, probably "origin">The argument --tags pushes all local tags to the remote target. If you want to
push only a specific tag, use:
git push <remote target, probably "origin"> <tag name, e.g., "v1.2.3">Creating a Release in the Web Interface
To create a release in the web interface, first go to the Releases tab of your
repository (1), and click on New Release (2):

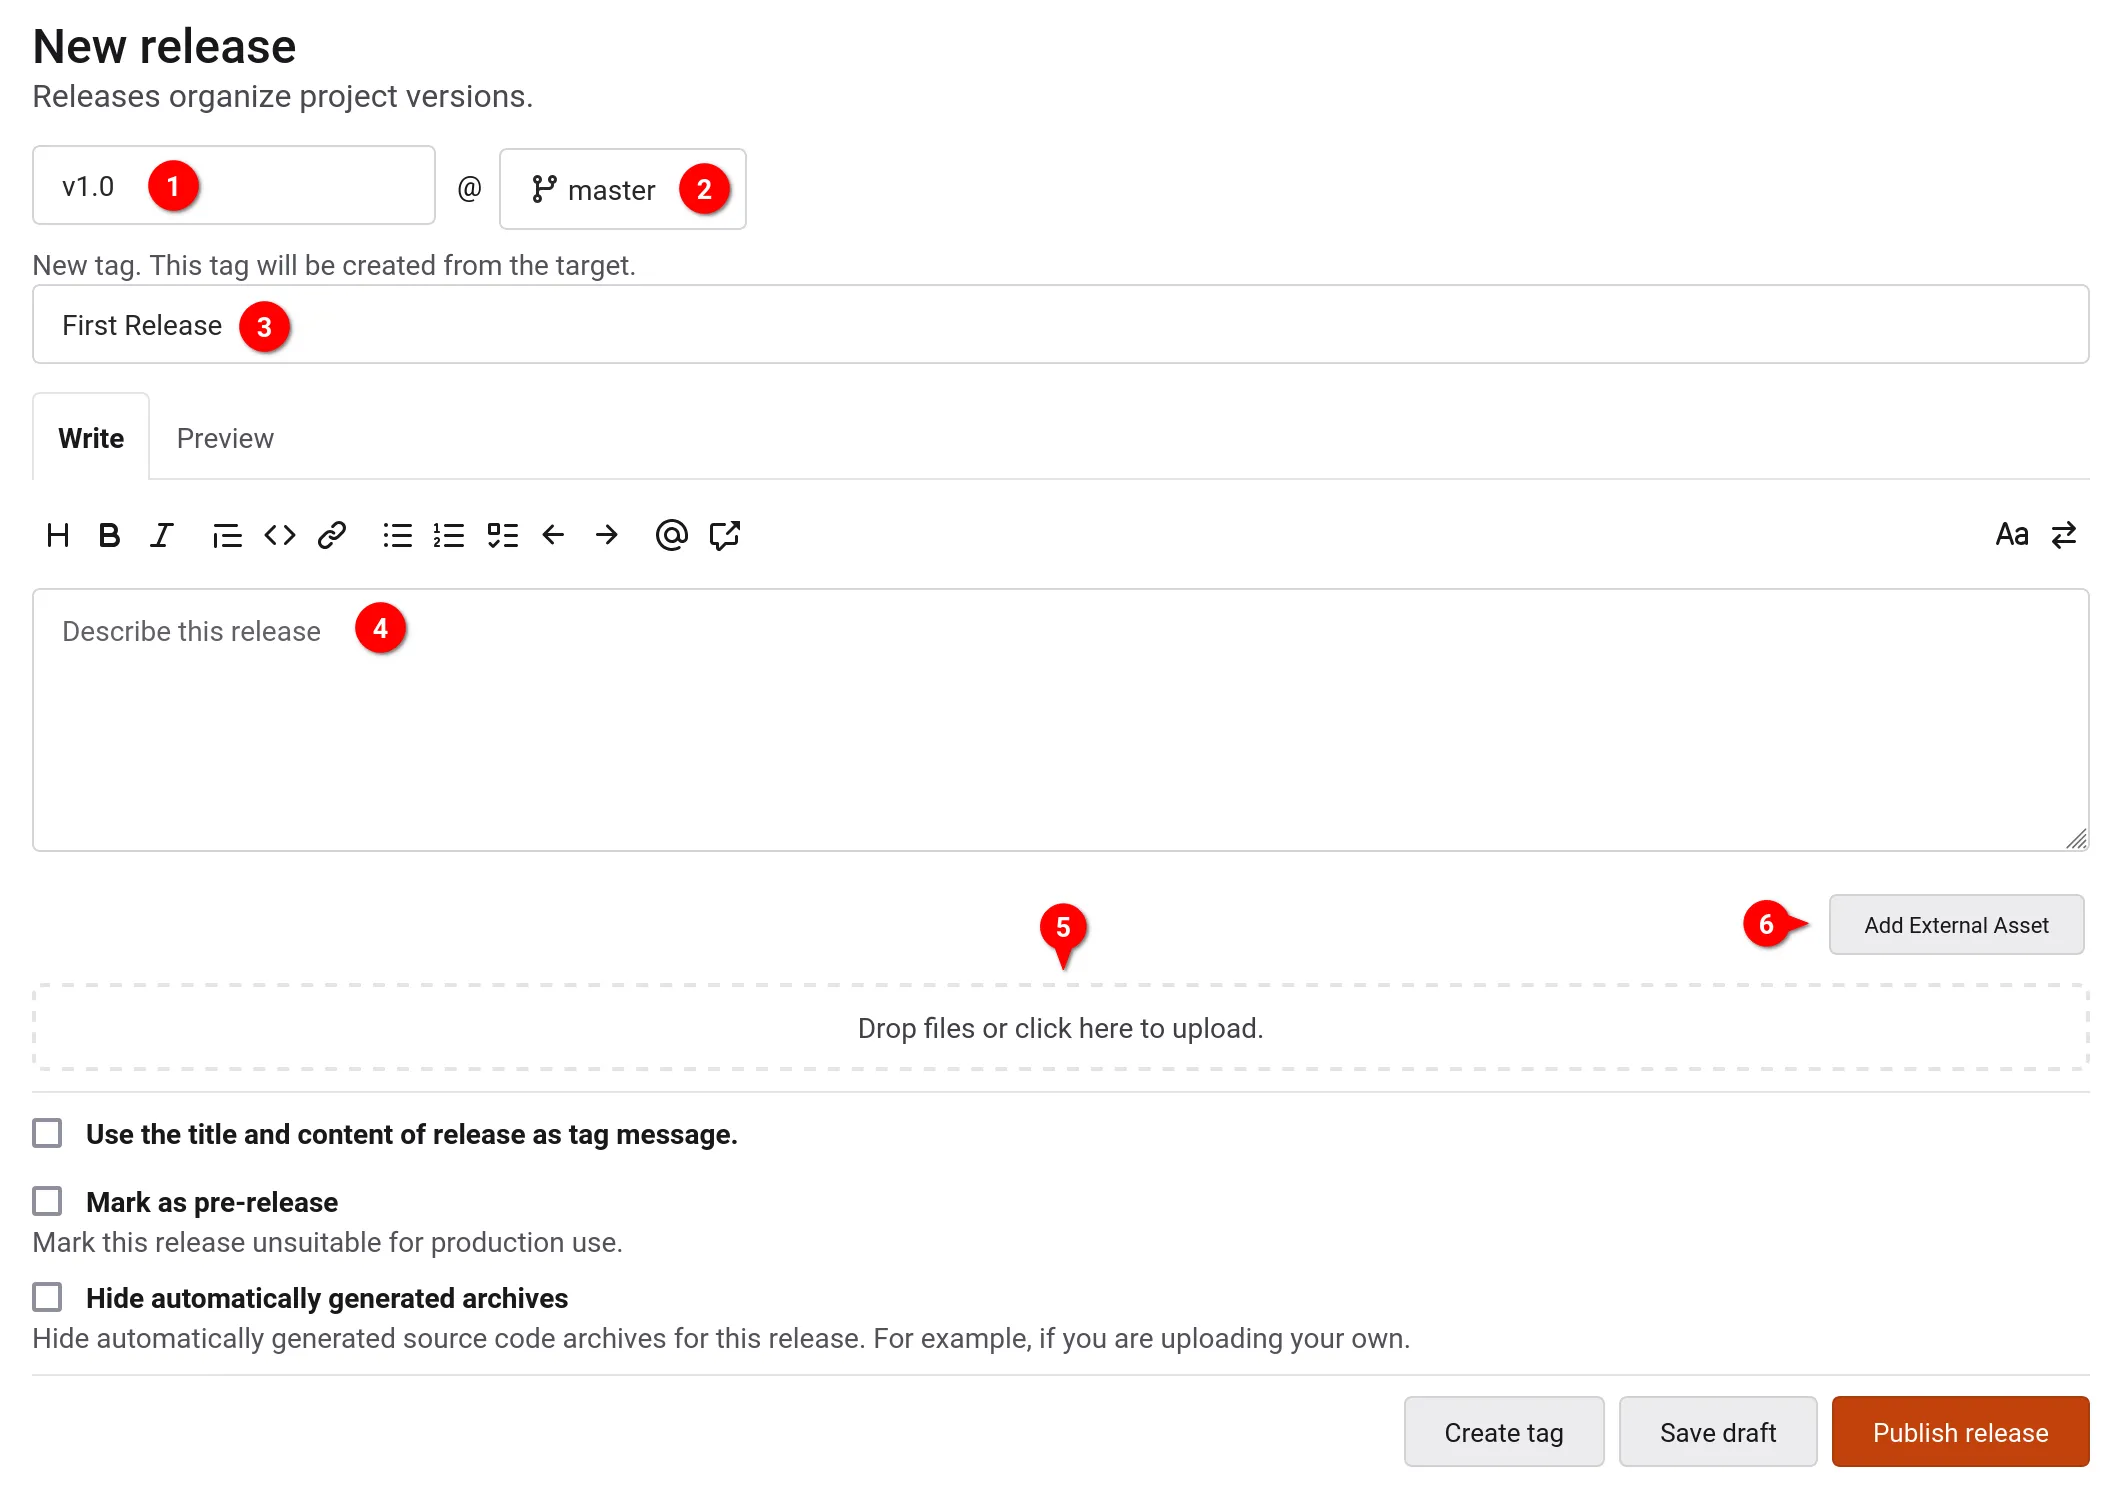
Here, you need to enter a version number for your new release (1), select the
branch that contains the code you want to release (2), and add a title (3).
Optionally, you can also add a description (4) or add assets to the release in
the form of attaching files (5) or adding external links (6):

You can now either save it as a draft, or publish the release outright.
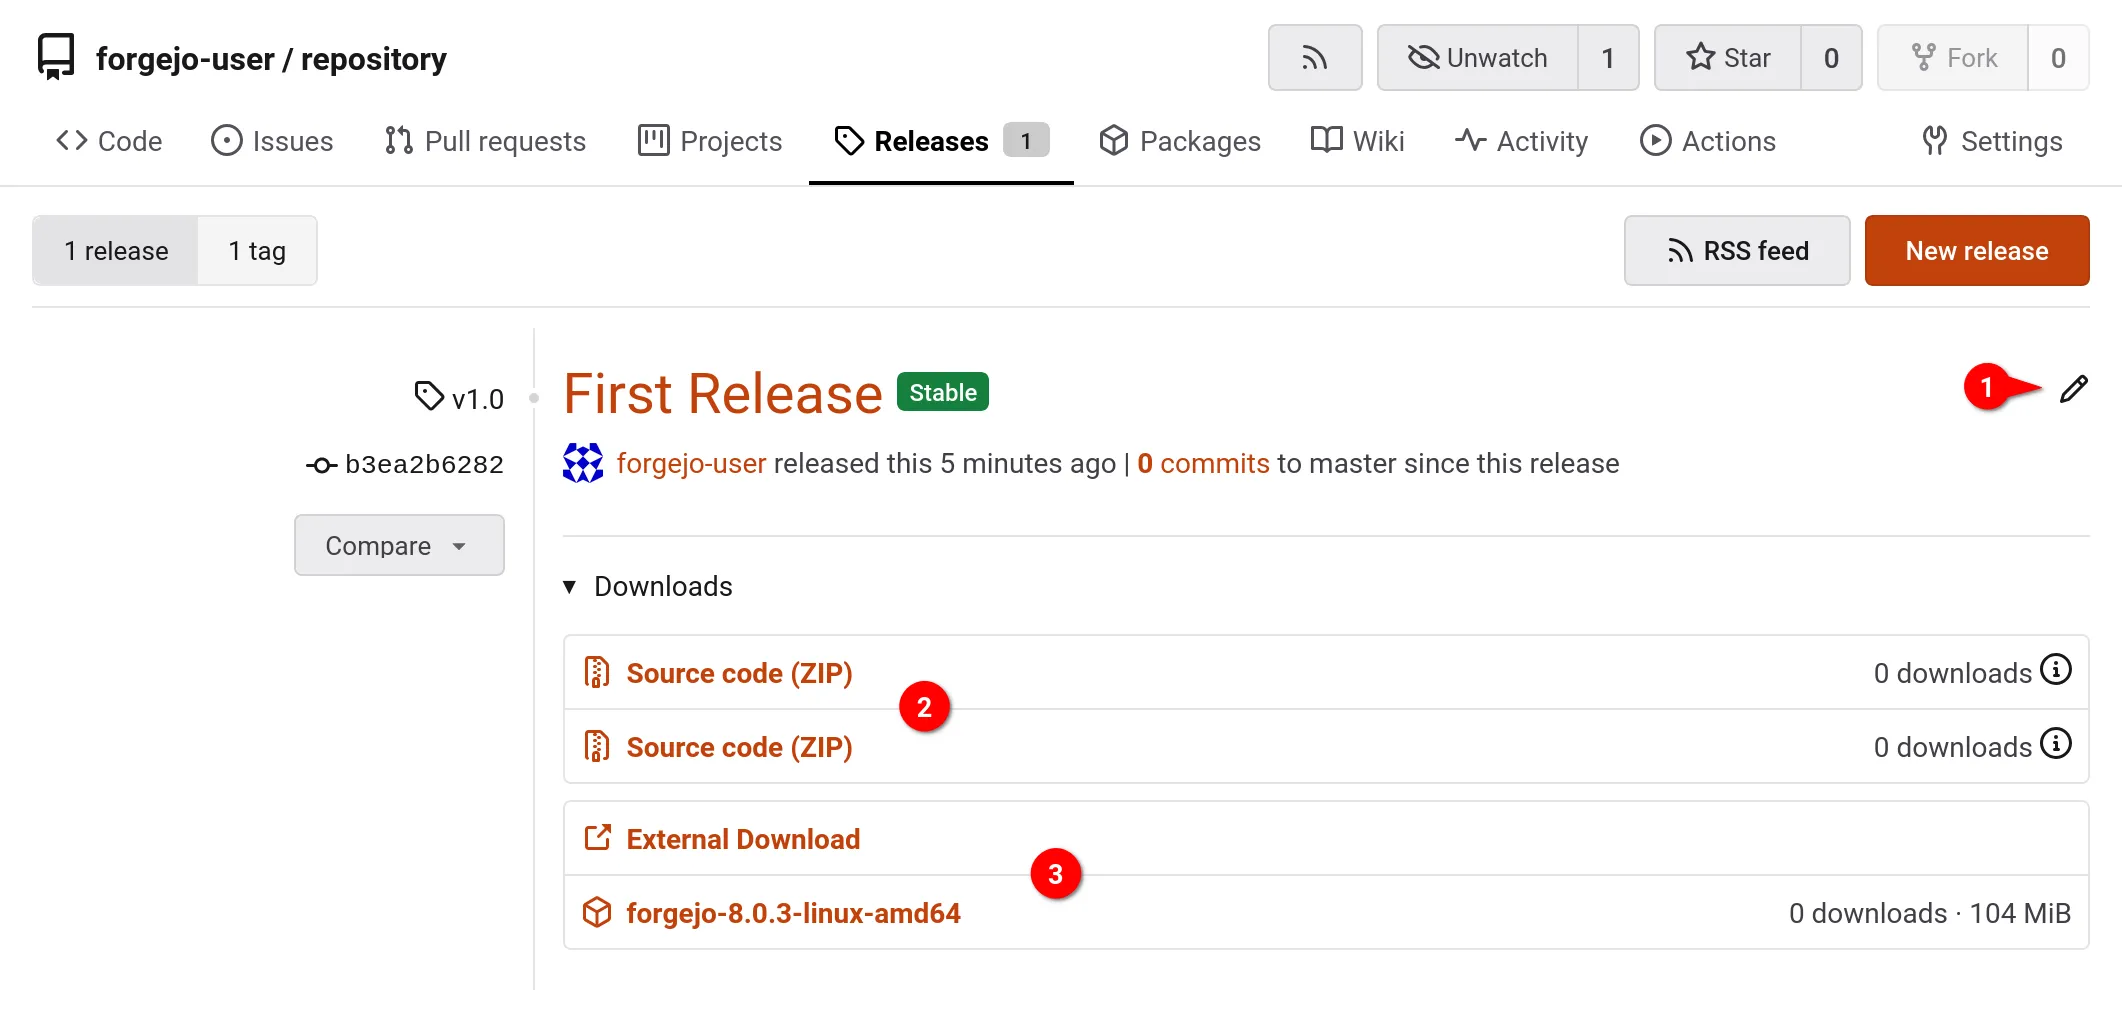
You are then redirected to the Releases tab of your repository. The newly
created release is now listed there:

Here, you can edit the release if needed (1). You will also see options to
download the source code of the repository at the commit the release was created
at as .zip or .tar.gz files (2). Finally, if on the previous page you
added assets like an attached file or an external link, they will also show up
here (3).
Creating a Release through the API
All the operations accessible in the web interface are also available through the API. You can use the following endpoints to:
/repos/{owner}/{repo}/releases
Create (or modify) a release/repos/{owner}/{repo}/releases/{id}/assets
Create (or modify) release assets
